 For the next stage of the Chest/Trunk, you will need, a piece of cotton material, thin leather or thick card, some stiff card for the inside of the chest, and a small piece of Miniature wallpaper, I found a perfect colour over on one of the printable sites on my Mini Links page. I printed it off on normal printer paper. I then measured the inside of the lid and cut a piece to fit and glued it in place.
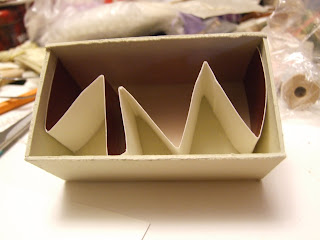
As I want the chest to look like it's overflowing, but not have to fill it all. I took a piece of card,and folded it up like a concertina, to fit in the bottom of the chest, this fills the gap up. I then cut another piece of card to lay over the concertinaed card, leaving approx a 1/4inch gap at the top & glued in place. (Please refer to the pictures).

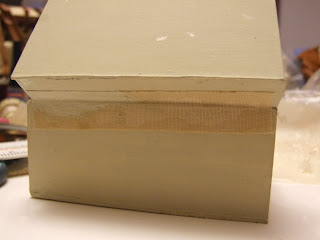
After completing this stage, get the lid and hold it in place as if the lid is nearly open, once you are happy with the placement, run a line of tacky glue along the back bottom edge of the chest and attach the lid, hold in place till the lid dries to the bottom. I wedged a bottle of paint in there to hold it as well. Once you are happy that the lid and bottom are firmly attached, take a piece of cotton fabric and glue this at lid/bottom join on the back of the chest. This is for added support. Once the glue on the material has fully dried, paint over it, in your chosen colour and leave to dry.
While the lid/bottom is drying, get your leather or thick card and cut strips approx 3/8Th's of an inch wide and long enough to go around the bottom of the chest and to go over the top of the chest.
Start at the bottom of the trunk and run a line of glue, then stick your leather/card, completely round the bottom. Then take further strips and stick them at equal distances from each edge on the top of the trunk and down to the bottom. For the two leather straps in the middle leave a little extra leather over hanging, so they look like the straps, that you would do the chest up with. Once you have completed the top, line up some leather/card with the top lines and attach to the bottom of the Trunk..
Tomorrow, if all goes OK here, we will start filling the Chest.
I'm off to bed now....


.jpg)


.JPG)


2 comments:
Hi Debbie, my trunk is almost ready, I'll have to look for leather.
I'll posting pictures in a moment on my blog.
Marlies, I've just been over to have a look. Well done you. Now for the fun filling it up..
Mini Hugs
Post a Comment